NOTE: Clicking the images will enlarge them in a new tab/window.
STEP 1: Insert a 3 column header: Insert (tab) > Header drop-box (Header & Footer panel) > select Blank (Three Columns). Erase the middle column once it has been inserted—click once and press Delete or Backspace. The left and right columns will align perfectly every time regardless.

STEP 2: Enter your header text and auto-page number function in the appropriate column area. This is done by clicking once on the [Type text] boxes and entering desired header text (left-side box), and using the insert page number function (right-side box).

NOTE: When inserting the page number: click the right-side box, select Page Number drop-box (from either the Insert or Design tabs) > Current Position > Plain Number.

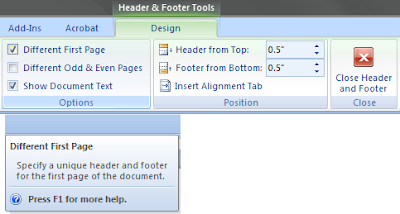
STEP 3: Select the Different First Page check-box in the Options panel under the Design tab. Do not worry if the header disappears.

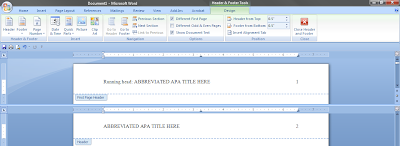
STEP 4: Repeat steps 1 and 2, and insert the desired text (i.e., "Running head: . . . ") and page number where appropriate.

STEP 5: You can insert a page break in the main body of the manuscript to see if it works. Once beyond page 1, the running head (sans the phrase: "Running head:") should appear.

STEP 6: Double click or highlight the individual header elements and format the text accordingly (i.e., 12-point, Times New Roman font).
ADDITIONAL NOTES:
- If your page number goes to the second line, click immediately after the conclusion of your header text and press the Delete key until your page number returns to the first line.
- There is more than one way to perform any action in Word, this is just a method we prescribe.
0 comments:
Post a Comment